The following python script I wrote to speed up my rigging process. There are a lot of repetitive steps when rigging any type of object. Creating an IK FK switch for several joint chains of a character is one of them. This is a really short script and the usage at the bottom is specific to the naming conventions I use, but should be relatively easy to adjust.
The first code snippet contains a method for duplicating an object. Furthermore all of it’s children and itself will be renamed based on the parameters. It searches for ‘oldSubString’ and replaces it with ‘newSubString’ while returning the duplicate object which is the highest one in the hierarchy. Renaming is one of major time consuming
import maya.cmds as cmds;

###
# duplicates the object with the name "oldObjectName" and replaces "oldSubSring" with "newSubString"
###
def CreateRenamedDuplicate(oldObjectName,oldSubSring, newSubString):
    newObj = cmds.duplicate(oldObjectName,renameChildren=True)
    relatives = GetAllRelativesAndSelf(newObj[0])

    for name in relatives:
        newName = name.replace(oldSubSring, newSubString)
        cmds.rename(name,newName)

        if newObj[0] == name:
            return newName
The next paragraph contains a method which returns an object and its relatives, quite small and neat.
###
# returns an array of all relatives of a provided object plus itself
###
def GetAllRelativesAndSelf(object):

    relatives = cmds.listRelatives(object, c=True, ad=True)
    relatives.append(object)
    return relatives
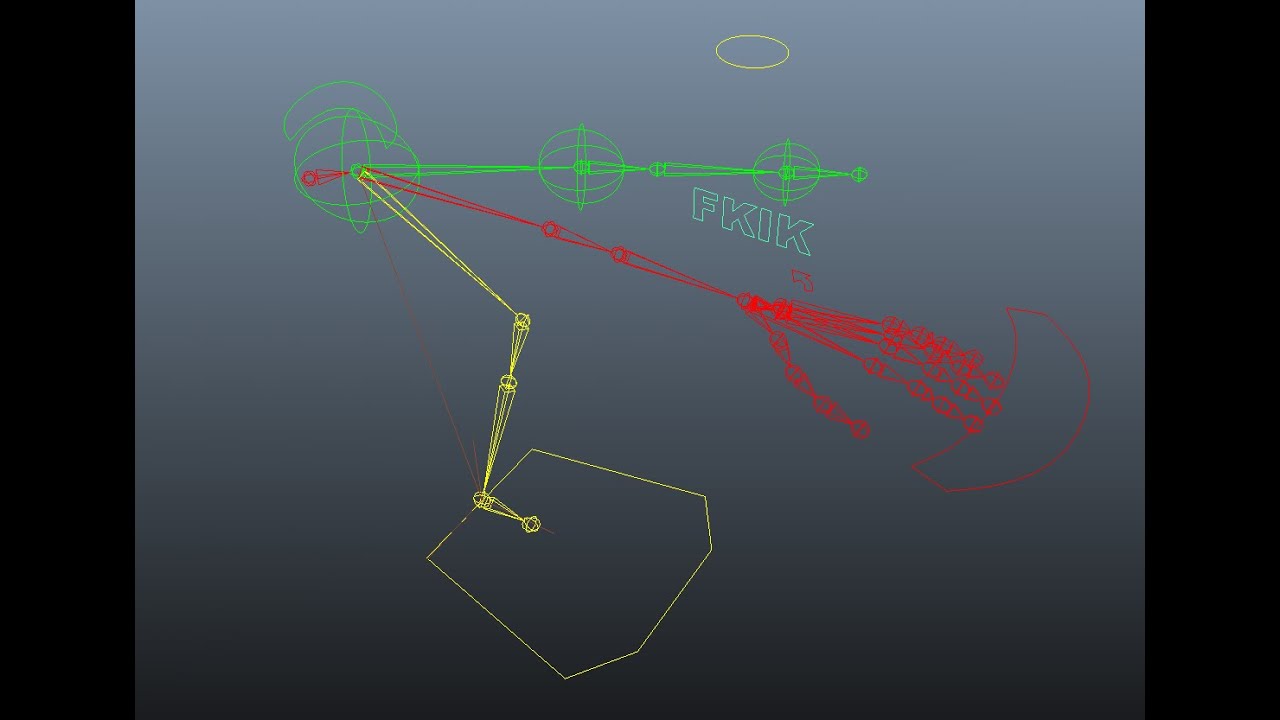
And that’s already the last part of the switch functionality. This will create arrays of all the involved objects. So the base joints, the iks and the fks. Then it will create a group which holds an attribute for blending between ik or fk. Then it creates a blendcolor node which is pretty much a lerp.Then we connect the rotation attributes of the ik and fk chain to the base joints, making it so that the base joints are now fully in control of the two joint chains. If you want to see a visual result, just open up the graph editor. By doing all this, we sped up a tedious process.
###
# creates attributes and connects them to setup a functional ik fk switch
###
def CreateIKFKSwitch(resultObj, ikObj, fkObj):
    baseObjects = GetAllRelativesAndSelf(resultObj)
    IKObjects = GetAllRelativesAndSelf(ikObj)
    FKObjects = GetAllRelativesAndSelf(fkObj)
    counter = 0

    switchName = "IK_FK_Switch"
    attributeToConnectFrom = "rotate"
    attributeToConnectTo = "color"

    controlGroup = cmds.group( empty=True, name='IK_FK_BlendControls' )
    cmds.addAttr (controlGroup,longName=switchName, minValue=0, maxValue=1, defaultValue=0, attributeType="double")
    cmds.setAttr(controlGroup + "."+switchName,edit=True, keyable=True)

    for obj in baseObjects:
        blendColorNodeName = switchName + "_"+IKObjects[counter]+"_"+FKObjects[counter]
        blendColors = cmds.shadingNode('blendColors',au=True,name=blendColorNodeName)
        cmds.connectAttr(IKObjects[counter]+"."+ attributeToConnect,blendColors + "." + attributeToConnectTo + "1")
        cmds.connectAttr(FKObjects[counter]+"."+ attributeToConnect,blendColors+ "." + attributeToConnectTo + "2")
        cmds.connectAttr(blendColors+".output",baseObjects[counter]+"."+ attributeToConnect)
        cmds.connectAttr(controlGroup+"."+switchName,blendColors+".blender")
        counter+=1;
At last all you need to do is create the individual chains and rename them. Then connect them all together. 50 lines of code which take away countless renaming , duplication and node creation steps. Maya’s API is really powerful, but the non-object oriented approach makes it quite hard at the start to understand how it wants to be used.
###
# Executing the procedures
###
selection = cmds.ls(sl=True)
ikChain = CreateRenamedDuplicate(selection,"_Jnt1", "_IK_jnt")
fkChain = CreateRenamedDuplicate(selection, "_Jnt1", "_FK_jnt")
CreateIKFKSwitch(selection[0],ikChain,fkChain);
Thanks for reading! If you have any more questions, please drop me a message.