
In this page I want to go over a few learning from my experience at Yager working as a Technical Artist. Some of these helped to speed up my workflow a lot and allowed me to provide better support to others.
Level Streaming
- Did you know you can press ‘alt’ in the world composition window to see what levels will be loaded considering your cursor position is your player position?
2. Locking a level is a good way to make sure it can’t accidentally moved. By the way, did you know that you can move levels in the world composition view by simply dragging the square anywhere else ( and by that moving all the actors which are part of it) ?
3. Consider breaking up your levels into exterior and interior ones. This will speed up the loading time when streaming it in and at the same optimizes the Level LODs to a maximum. You only need to build them for exteriors if assigned smartly.
4. If you struggling to find / select a level in the World Composition window, simply click on the level in the Levels overview to select it in the other one as well.
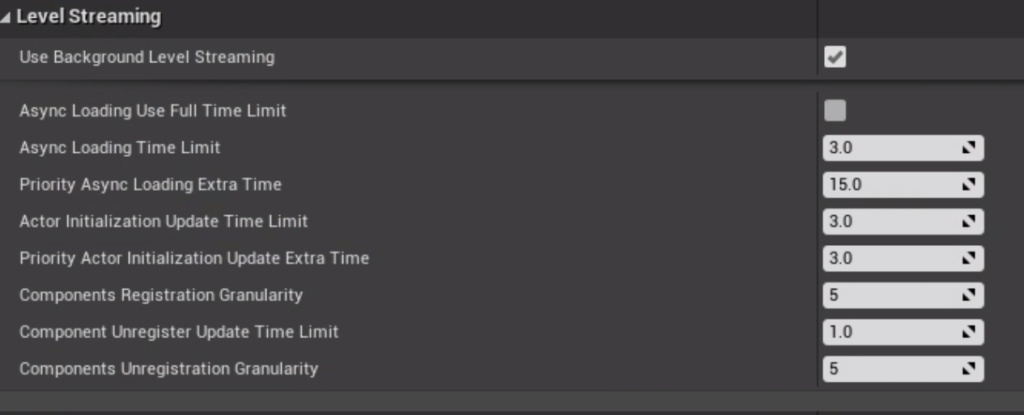
5. Level Streaming can e quite a heavy task and steal you a lot of performance for a few frames. In the Project settings in the Engine category, you can find a Level Streaming section which allows you to adjust the values to spread the cost over multiple frames.
6. There are two big factors which you should think about when trying to reduce the amount of time it takes to stream a level: UObject count and the Construction scripts those objects have. Optimize both ( or maybe lazy initiate your actors) to get the shortes loading times.
Editor Utility
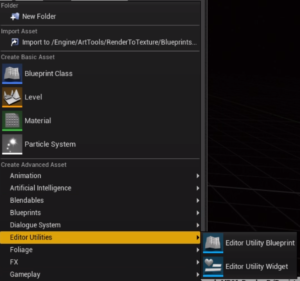
- Did you know you could create Editor-Only-Blueprints which have access to Editor functionality?
2. Did you know that you could checkout assets from within a blueprint? This makes bulk editing way easier.

3. Asset Actions allow for quick bulk editing properties like disabling Mesh Distance Fields which are not accessible through the Property Matrix Tool.
4. Did you know that you could make Cameras render directly to a (render target) texture? Additonally, you can easily export those, even from within BP. Just use the ‘Export to File’ node.
5. Same applies to the procedural mesh component which allows you to build a mesh from ground up from within BP and even has a button in its Details Panel to export it.
Instancing
There are two ways in UE4 to trigger instancing (batching draw calls), whether you use Auto Instancing which needs to be enabled in the Project Settings or you use Hierachical Instanced Static Mesh Components.
- Be careful when using HISM Components because if you see one applied instance, UE4 will all instances at once. This could cause a massive overhead (excess rendering costs, shadow, lighting etc) but at the same time, saves you a lot of occlusion queries.
- If you want to quickly debug how your setup is performing, type ‘freezerendering’ into the console. Now you can walk around and see what was rendered at the point in time.
- Try to be smart about your instancing : always think of what could the player see at a time.
Shadows
- Always think about something actually requires a shadow. Since UE4 allows you to deactivate them on a per instance base, this could become a tedious task. Consider doing it like the guys from Fortnite: don’t place Static Meshes but BPs. So you can bulk edit if required but overwrite them.
- If you use dynamic shadows and you have very large (bigger than 2000×2000 ) actors (maybe created through instancing) in your game, think about shadow proxies which could easily be split into several pieces. The procedural mesh component can be great help to create a mesh based on the bounds.
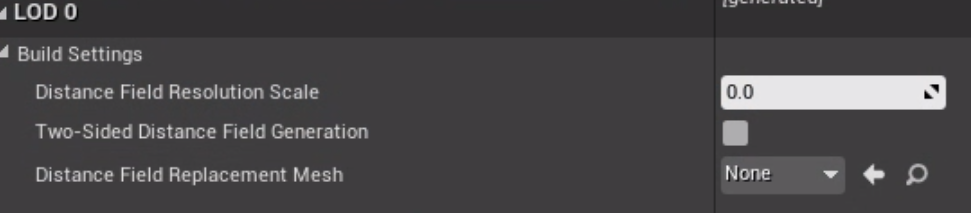
- Mesh Distance Field Shadows are a great way of creating shadows in a further distance without paying the costs for the more advanced cascaded shadows. But keep in mind, having lots of small objects throwing mesh distance field shadows might negate the positive impact. It might be worth turning the MDF shadows off instead by setting the scale to 0 in the static mesh settings. Don’t forget you need to do this on a per LOD basis!
4. Another quick way of getting rid of shadow costs is to create your plane with a dark material and put it as a part of a BP underneath your mesh.
C++
- One of the worst documented parts of the engine is the Undo / Redo functionality. It’s called Transactions. So let’s look at the following code:
#include "ScopedTransaction.h"

void MyNameSpace::MyFunction()
{
        FScopedTransaction Action(LOCTEXT("Category of my action","My Text which will appear in the history"));
	UObjectWhichIsModifiedInThisContext->Modify();
}
Put this on top of the context which executes something which you want to be able to undo. Then execute ‘Modify()’ on the UObject* which properties you’re changing. Calling this functions sets it dirty and tells UE4 what should be undone. If you want a callback for when Redo / Undo happens, just inherit your class from FEditorUndoClient.
2. Whenever you think about using a pointer, consider using TWeakObjPtr instead to make your code safer.
I will extend this tutorial over time to show you more neat and quick things which allow you to get your job done quicker. Thanks for reading!